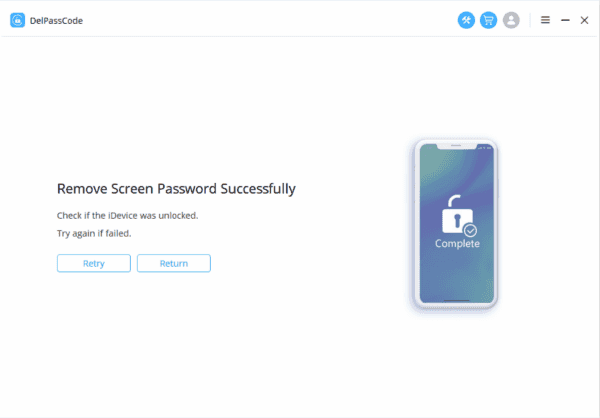
Have you ever encountered the frustrating message on your iPad saying “iPad Disabled”? This issue can cause panic and confusion, especially when you’re unsure about its causes and how to resolve it. Fear not, as we delve into the depths of what “iPad Disabled” means, its origins, solutions, and steps to prevent it from happening again.
What does “iPad Disabled” mean?
When your iPad displays the message “iPad Disabled,” it typically signifies that the device has been locked or disabled due to too many incorrect passcode attempts. This security feature activates to protect your iPad from unauthorized access or potential breaches. This scenario commonly occurs when someone enters the wrong passcode multiple times consecutively.
What are the causes of “iPad Disabled”?
The primary reason for an iPad becoming disabled is the input of an incorrect passcode multiple times in a row. This could be accidental, such as when a child plays with the device or when you forget the passcode yourself. Other potential causes include technical glitches or software malfunctions that might trigger the device to disable itself as a security measure.
| Method | Recommended | Conditions | Evaluation |
| DelPasscode For iOS | No need for a password or any conditions | iTunes and mobile phones don’t require intricate buttons. Simply adhere to the software guidance, and your iPhone will unlock itself within 5 minutes. The process is straightforward and easy to follow. | |
| iTunes | It is necessary to have utilized iTunes for data backup. | If data synchronization hasn’t been performed using iTunes for the iPhone, an error message will appear on the iTunes interface stating | |
| Siri | Your own iPhone | System malfunction occurs or the iPhone will be bricked. | |
| iCloud | Please activate [Find My iPhone] and ensure your Apple ID account and password are active. | If [Find My iPhone] isn’t activated and you’re unaware of your Apple ID password, this method cannot be utilized. | |
| Recovery Mode | You have to manually set the iPhone to enter Recovery mode. | 1. Entering recovery mode on an iPhone involves somewhat intricate steps. 2. Incorrect execution of the process might lead to new issues on the iPhone, like error codes 4013, 4000, and others, resulting in a black screen on the device. |
Free Way 1: How to Fix a Disabled iPad using iTunes
Encountering the frustrating situation of a disabled iPad due to multiple incorrect passcode attempts or software issues can be disheartening. However, a viable solution exists through the use of iTunes. Below is a detailed, step-by-step guide on how to resolve this issue and regain access to your disabled iPad:
Step 1: Prepare and Connect
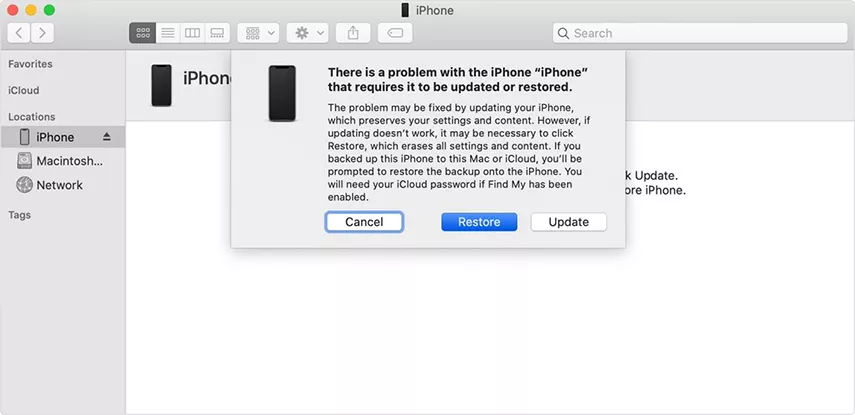
Begin by ensuring that your computer has the latest version of iTunes installed. Utilize the original USB cable provided with your iPad to establish a connection between your device and the computer. Launch iTunes, then proceed to connect your iPad. Access Recovery Mode by following the provided steps within iTunes.
Step 2: Restore via iTunes
Once in Recovery Mode, iTunes will promptly recognize your iPad and offer the option to either restore or update. Opt for the “Restore” option. This action will erase all data on your iPad and initiate the installation of the latest iOS version. Post-restoration, your iPad will restart. Follow the on-screen setup instructions to configure your device as new or choose to restore from an available backup. If you possess a previous backup stored in iTunes or iCloud, utilize this opportunity to recover your data during the setup process. As a security measure, set up a new passcode for your iPad, ensuring it strikes a balance between memorability and security to prevent future occurrences of a disabled iPad.
It’s crucial to note that this method results in the complete erasure of all data on your iPad. Having a backup available is highly advisable to prevent permanent data loss. Nonetheless, this method stands as a dependable means to regain access to your disabled iPad.
Remember: A backup is essential to prevent data loss, as the restoration process will erase all existing content on your iPad. Despite this, using iTunes to restore your disabled iPad is a trusted and effective solution.
Free Way 2: How to Fix Disabled iPad with iCloud
Encountering a disabled iPad can be a frustrating experience, especially when it prevents you from accessing your device. Fortunately, one of the effective methods to fix a disabled iPad is by using iCloud. This article will provide a comprehensive guide on how to restore a disabled iPad using iCloud, allowing you to regain access to your device and its functionalities.
Step 1: Access iCloud.com
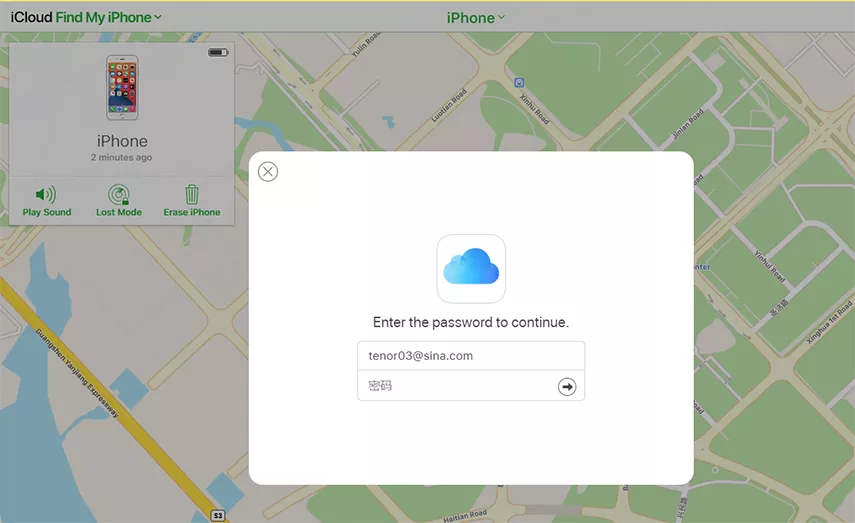
The initial step involves accessing iCloud.com from a computer or another device with internet connectivity. Sign in using the Apple ID associated with the disabled iPad.
Step 2: Navigate to Find My iPhone/iPad
Once logged in, click on “Find iPhone” or “Find iPad” (depending on the device being used). This will open the Find My iPhone/iPad interface.
Step 3: Select the Disabled iPad
Locate and select the disabled iPad from the list of devices linked to your Apple ID. The device’s current location will be displayed on the map.
Step 4: Choose ‘Erase iPad’ Option
Click on the “Erase iPad” option. This action will remotely wipe all data and settings on the disabled iPad. Confirm the action when prompted.
Step 5: Set Up the iPad
After confirming the erasure, proceed by setting up the iPad as a new device. Follow the on-screen instructions, which will include selecting language, region, and Wi-Fi network.
Step 6: Restore from iCloud Backup
During the setup process, select the option to “Restore from iCloud Backup.” Sign in to iCloud using the same Apple ID and choose the most relevant backup that contains your data.
Step 7: Wait for the Restoration
The restoration process may take some time, depending on the size of the backup and the internet connection speed. Ensure that the iPad remains connected to a stable Wi-Fi network until the process completes.
Step 8: Complete Setup and Verification
Once the restoration finishes, follow the prompts to complete the setup. You will be required to enter your Apple ID credentials and passcodes. Verify that your data, apps, and settings are restored correctly.
Step 9: Use the Restored iPad
Congratulations! Your disabled iPad has been successfully restored using iCloud. You can now use your device as usual, with access to your data and apps.
Free Way 3: How to Fix a Disabled iPad by Force Restart
Experiencing a disabled iPad can prove to be an exasperating situation, particularly if you’re uncertain about how to rectify the problem. Fortunately, there exists a straightforward and effective method to tackle this issue: performing a force restart on your device. This technique serves as a reliable means to regain control and access to your iPad, a solution applicable when the device becomes disabled due to various factors such as forgotten passcodes or software malfunctions.
Below is a comprehensive step-by-step guide detailing the process of force restarting your disabled iPad:
Step 1: A message indicating your iPad’s disablement suggests that multiple incorrect passcode attempts have been made, leading the device to activate a security lock.
Step 2: To initiate a force restart, specific buttons on your iPad need to be pressed. The button combination and sequence may differ based on your iPad model. For instance:
Step 3: Adhere to the precise button sequence corresponding to your iPad model, as mentioned above. Exercise patience and ensure accuracy in pressing the buttons in the designated order and timing.
Step 4: Following the force restart, your iPad might enter recovery mode. If prompted to either update or restore your iPad, opt for “Restore.” This action will result in the erasure of all data on your iPad, followed by the reinstallation of the iOS software.
Step 5: Should you possess a previously saved backup on iCloud or iTunes, upon the completion of the restoration process, you can restore your iPad using this backup. Doing so will restore your applications, settings, and data.
In instances where the force restart fails to yield results or if persistent issues persist, seeking guidance and assistance from Apple Support is recommended. It’s crucial to note that performing a force restart will not erase your data unless you proceed with the restoration process from recovery mode. Regularly backing up your iPad is imperative to prevent data loss during unforeseen circumstances.
Way 4: How to Fix a Disabled iPad by DelPasscode For iOS
A disabled iPad can occur due to various reasons, most commonly when the passcode is entered incorrectly multiple times. This situation can be frustrating, leaving users unable to access their device and its contents. However, DelPasscode For iOS offers a reliable method to bypass this problem without compromising data security.
Steps to Fix a Disabled iPad with DelPasscode for iOS
Step 1: Obtain and Install DelPasscode for iOS from a trusted source. Install the software on your computer.
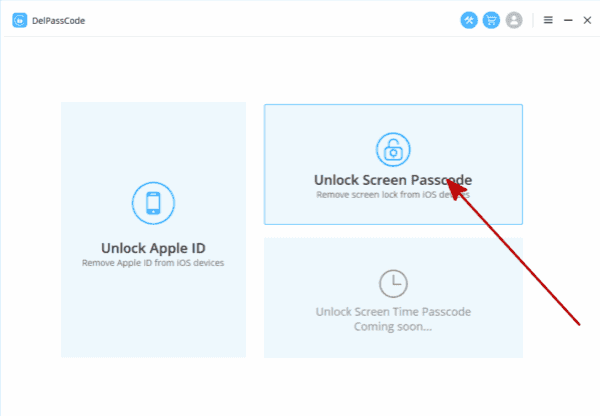
Step 2: Open the DelPasscode software on your computer after installation. Connect your disabled iPad to the computer using a USB cable.
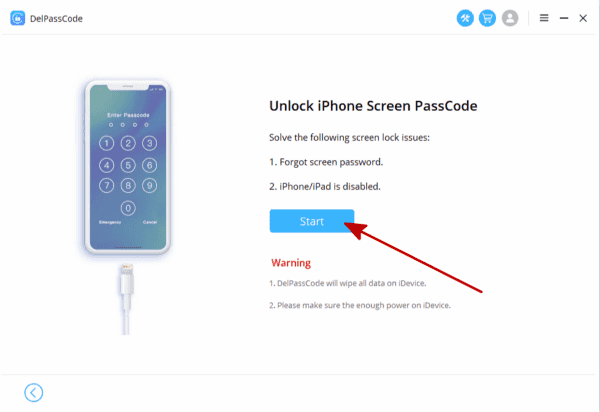
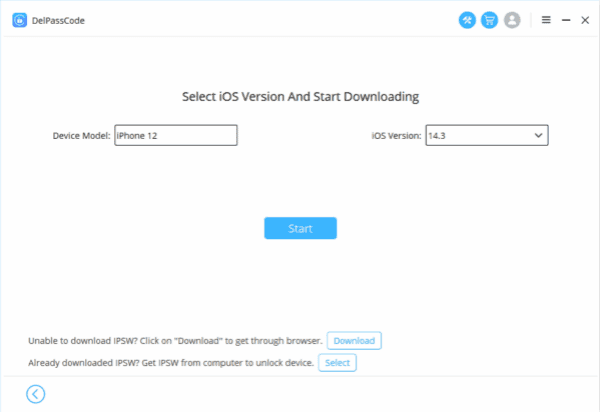
Step 3: Once DelPasscode recognizes your iPad, select the appropriate device model and firmware version.
Step 4: Follow DelPasscode’s instructions to enter DFU (Device Firmware Update) mode on your iPad. This step is crucial for the software to function correctly.
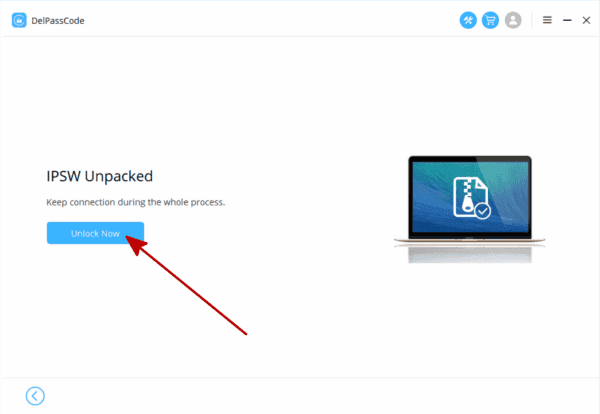
Step 5: Upon completion of the DelPasscode process, your iPad will automatically restart. You should now be able to access your device without the passcode.
Step 6: Consider setting a new passcode for your iPad after gaining access for security purposes.
Dealing with a disabled iPad due to a forgotten or incorrect passcode can be concerning. However, with tools like DelPasscode for iOS, this issue can be resolved effectively. By adhering to the steps provided in this guide, users can regain access to their iPad without compromising data security. Always proceed with caution and take necessary precautions to safeguard the device and its contents during the unlocking process.
Conclusion
In conclusion, encountering a disabled iPad due to forgotten or incorrect passcodes can be a distressing predicament. However, various methods, such as using iTunes, iCloud, performing a force restart, or employing specialized software like DelPasscode for iOS, provide effective solutions to regain access to your disabled iPad. By following the steps detailed in this guide, users can navigate through this issue without compromising the security of their device’s data.
Always remember to proceed with caution and take necessary precautions when resolving a disabled iPad situation. Regularly backing up your iPad’s data is advisable to prevent irreversible data loss during the restoration process. With the aid of these methods and a proactive approach to device security, users can mitigate the distress caused by a disabled iPad and ensure uninterrupted access to their device and its functionalities.

