There are instances when we find ourselves locked out of our Sony phones due to forgotten passwords or patterns. The good news is that there are multiple ways to regain access, and in this article, we’ll explore three free methods to unlock your Sony phone. The first method involves utilizing your Google account, the second employs the device’s Recovery Mode, ADB and the third introduces a specialized tool, DelPasscode For Android.
| Method | Recommended | Conditions | Success Rate |
| DelPasscode For Android | USB Cable | 98% | |
| Find My Mobile | “Find my phone” must be enabled, and the account corresponding to the Android brand is required. | 70% | |
| Google Find My Device | Provide a Google account and password. Logged in and bound Google account | 70% | |
| Recovery Mode | Complex, requires Google account and password, otherwise FRP lock may occur | 50% |
Free Way 1. A Step-by-Step Guide on How to Unlock Your Sony Phone Using Your Google Account
In today’s fast-paced digital world, our smartphones have become an integral part of our daily lives. Unfortunately, there are times when we may forget the password or pattern lock on our Sony phones, leaving us locked out. The good news is that unlocking your Sony phone can be a relatively straightforward process if you have associated it with your Google account. In this article, we will guide you through the steps to unlock your Sony phone using your Google account.
Step 1: Ensure Internet Connectivity
Before attempting to unlock your Sony phone with your Google account, make sure that your device has an active internet connection. This can be through Wi-Fi or mobile data.
Step 2: Enter the Wrong Password or Pattern
On your Sony phone, attempt to unlock the device by entering the wrong password or pattern several times. After a few unsuccessful attempts, your device will recognize this as a potential security threat and prompt you with alternative unlocking options.
Step 3: Tap on “Forgot Pattern” or “Forgot Password”
Once you’ve exceeded the maximum number of incorrect attempts, your Sony phone will display an option such as “Forgot Pattern” or “Forgot Password.” Tap on this option to proceed.
Step 4: Enter Your Google Account Credentials
You will be prompted to enter the Google account associated with your Sony phone. Input the email address and password linked to the Google account you used when setting up the device.
Step 5: Follow the On-Screen Instructions
After entering your Google account credentials, follow the on-screen instructions to verify your identity. This may involve solving a captcha or confirming your identity through a secondary email or phone number associated with your Google account.
Step 6: Create a New Unlock Pattern or Password
Once your Google account has been successfully verified, your Sony phone will prompt you to set a new unlock pattern or password. Choose a new security option that you can easily remember but is secure enough to protect your device.
Step 7: Unlock Your Sony Phone
With the new unlock pattern or password set, your Sony phone is now ready for use. You can now access your device using the newly created security credentials.
Forgetting the password or pattern on your Sony phone can be a frustrating experience, but with the integration of Google account security features, unlocking your device has become a straightforward process. By following the steps outlined in this guide, you can efficiently use your Google account to regain access to your Sony phone and continue using it without the need for factory resets or additional complications. Remember to choose a secure and memorable unlock pattern or password to ensure the ongoing security of your device.
Free Way 2: A Step-by-Step Guide on How to Unlock Your Sony Phone Using Recovery Mode
Sony phones are known for their sleek designs and powerful features, but there might be instances where you find yourself locked out of your device due to forgotten passwords or patterns. In such situations, using the Recovery Mode can be a lifesaver. This article will guide you through the process of unlocking your Sony phone using the Recovery Mode.
What is Recovery Mode?
Recovery Mode is a built-in feature on Android devices, including Sony phones, designed to perform various system-level tasks. One of its functions is to help users troubleshoot and perform actions like a factory reset, which can be useful when dealing with lockouts or software issues.
Before you begin:
Before you proceed with unlocking your Sony phone using Recovery Mode, it’s essential to understand that this method will erase all data on your device. Ensure that you have backed up your important data, such as contacts, photos, and messages, to prevent any loss.
Unlocking Sony Phone with Recovery Mode:
Follow these step-by-step instructions to unlock your Sony phone using Recovery Mode:
Step 1: Power off your Sony phone.
Press and hold the power button until the power off menu appears on the screen. Tap on “Power off” and wait for the device to shut down completely.
Step 2: Boot into Recovery Mode.
Different Sony models may have slightly different button combinations to enter Recovery Mode. Commonly, you can try the following method:
– Press and hold the Volume Up button.
– While holding the Volume Up button, press and hold the Power button.
Continue holding both buttons until the Sony logo appears, and then release them. This should boot your phone into Recovery Mode.
Step 3: Navigate through Recovery Mode.
In Recovery Mode, you can use the volume buttons to navigate and the power button to select options. Use the volume down button to scroll to “Wipe data/factory reset” or a similar option, and then use the power button to select it.
Step 4: Confirm the factory reset.
Navigate to the “Yes” option using the volume buttons and confirm your selection with the power button. This will initiate the factory reset process, erasing all data on your Sony phone.
Step 5: Reboot your device.
After the factory reset is complete, select the option to “Reboot system now” from the Recovery Mode menu. Your Sony phone will restart, and you should now have access to it without the previous lock screen.
Using Recovery Mode to unlock your Sony phone is an effective method, but it comes with the significant downside of data loss. Therefore, it’s crucial to backup your data regularly to avoid any potential inconvenience. If you are unable to unlock your device using the Recovery Mode or encounter any issues, it’s recommended to contact Sony customer support for further assistance.
Way 3 : Unlocking Your Sony Phone Made Easy with DelPasscode For Android
Unlocking your Sony phone can provide you with the freedom to switch carriers, use local SIM cards while traveling, and explore various customizations and applications that may not be available on a locked device. One efficient and reliable method to unlock your Sony phone is by using DelPasscode for Android. In this article, we will guide you through the process of unlocking your Sony phone with ease and precision.
What is DelPasscode For Android?
DelPasscode For Android is a specialized software designed to unlock Android devices, including Sony phones, by removing the carrier restrictions and unlocking the bootloader. This tool ensures a smooth and secure process, allowing users to gain full control over their devices.
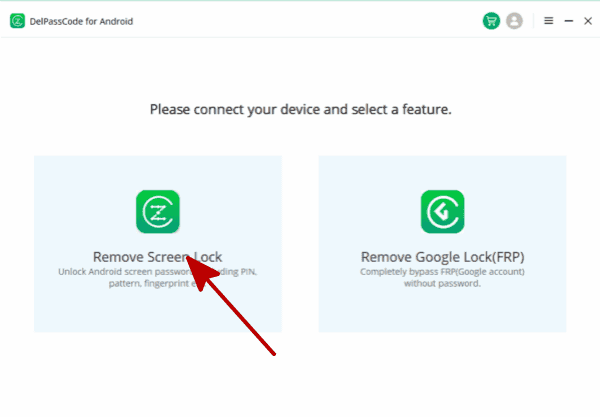
Step 1. Select a DelPasscode For Android
Choose a reliable Android Unlocker Tool compatible with Sony phones. There are various tools available online, but it’s essential to select one with positive reviews and a history of successful unlocks.
Step 2. Download and Install DelPasscode For Android
Once you’ve selected a tool, download it from the official website or a trusted source. Follow the installation instructions carefully to ensure the tool is properly installed on your computer.
Step 3. Launch the Android Unlocker Tool
Open the installed tool and connect your Sony phone to your computer using a USB cable. DelPasscode For Android should automatically detect your connected Sony phone. Confirm that the tool has identified your device correctly before proceeding.
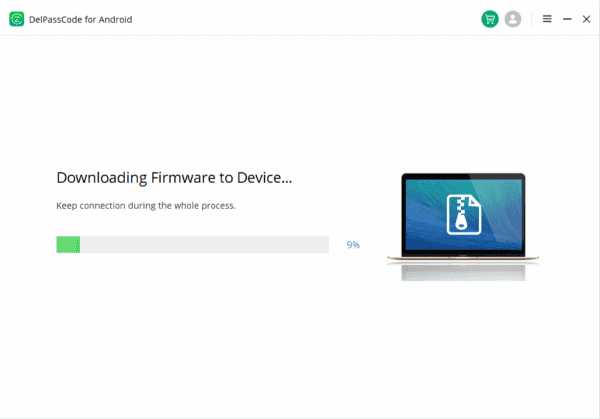
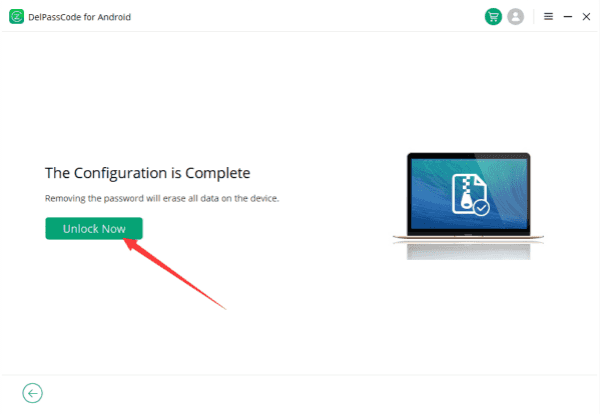
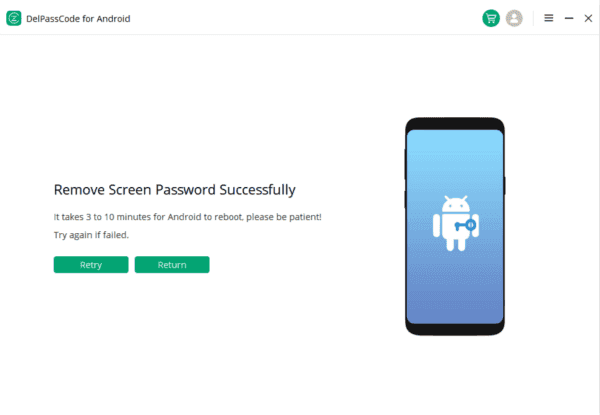
Step 4. Wait for the Unlocking Process to Complete
Patience is key during the unlocking process. Allow DelPasscode For Android to complete the necessary steps, and avoid interrupting the process to prevent any complications.
Unlocking your Sony phone with an Android Unlocker Tool can open up a world of possibilities and flexibility. However, it’s crucial to choose a reputable tool, follow the instructions carefully, and be aware of the potential consequences of unlocking your device. By doing so, you can enjoy the benefits of an unlocked Sony phone while maintaining the security and functionality of your device.
Free Way 4. A Step-by-Step Guide on How to Unlock Your Sony Phone Using ADB
Unlocking your Sony phone using Android Debug Bridge (ADB) can be a valuable skill for users who wish to gain more control over their device or switch carriers. ADB is a versatile command-line tool that allows users to communicate with their Android devices from a computer. In this guide, we’ll walk you through the steps to unlock your Sony phone using ADB, ensuring that you follow the process carefully and responsibly.
Before You Begin:
1. Enable Developer Options:
- Go to your phone’s Settings.
- Scroll down to “About phone” and tap on it.
- Find the “Build number” entry and tap it seven times to enable Developer Options.
2. Enable USB Debugging:
- In Developer Options, enable USB Debugging.
- Connect your Sony phone to your computer using a USB cable.
Unlocking with ADB:
Now that you’ve set up Developer Options and USB Debugging, follow these steps to unlock your Sony phone:
Step 1: Install ADB on Your Computer
Before you proceed, make sure you have ADB installed on your computer. You can download the Android SDK package, which includes ADB, from the official Android Developers website.
Step 2: Open a Command Prompt or Terminal Window
On your computer, open a command prompt (Windows) or terminal window (macOS or Linux).
Step 3: Verify ADB Connection
Type the following command to ensure that your device is properly connected:
adb devices
If your device is listed, you’re ready to proceed.
Step 4: Reboot into Fastboot Mode
To unlock the bootloader, your phone must be in fastboot mode. Type the following command to reboot into fastboot:
adb reboot bootloader
Step 5: Unlock the Bootloader
Unlocking the bootloader will wipe all data on your device, so make sure to back up important information. Once your phone is in fastboot mode, enter the following command:
fastboot oem unlock
You may be prompted on your phone to confirm the bootloader unlock. Use the volume keys to navigate and the power button to select “Yes.”
Step 6: Reboot Your Phone
After unlocking the bootloader, reboot your phone by entering the following command:
fastboot reboot
Your Sony phone is now unlocked and ready for further customization.
Important Considerations:
– Warranty Implications:
– Unlocking the bootloader may void your device warranty. Check with Sony or your carrier for details.
– Data Loss:
– Unlocking the bootloader wipes all data on your device. Ensure you have a backup before proceeding.
– Security Risks:
– Be cautious when unlocking your phone, as it could expose your device to security risks. Only use trusted sources and follow official guides.
Unlocking your Sony phone using ADB provides you with greater control and customization options. However, it comes with potential risks, so it’s essential to follow the steps carefully and understand the implications. Always check for updated instructions and use reliable sources to ensure a smooth unlocking process. Unlock responsibly and enjoy the freedom to explore the full potential of your Sony device.
Conclusion
Locked out of your Sony phone? Fear not, as the methods outlined in this article offer diverse solutions catering to different preferences and situations. Whether you prefer the simplicity of using your Google account, the versatility of Recovery Mode, ADB or the efficiency of DelPasscode For Android, unlocking your Sony phone is within reach. Remember to exercise caution, back up your data, and choose a method that aligns with your comfort level and specific needs. By doing so, you’ll regain access to your Sony phone seamlessly, ensuring an uninterrupted and personalized mobile experience.


